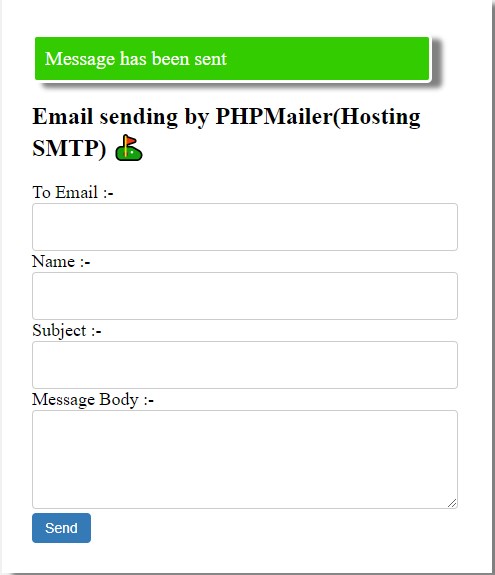
The email system plays an important role in a website. If you want to send email from your website to the desired email with 100% percent delivery surety then you should use the PHP Mailer library. PHPMailer is a code library to send emails safely and easily via PHP code from a web server. In this tutorial, we will send emails using PHP mailer and Hosting SMTP. As you know that we can create a business email and password from the Cpanel. We will use hosting business email and password to connect PHP mailer to hosting SMTP. In this tutorial, we will create a form to input email, name, subject, and message body. The HTML form will be used to send email messages from the website through PHPMailer and hosting SMTP. You will learn the complete installation of PHPMailer with the composer.
PHPMailer installation and loading –
First of all, we need to download PHPMAILER library. Kindly download it in the zip file and extract it from where you want to create your project.
Rename folder name PHPMailer-master to PHPMailer.
How to install composer and use of command line in the project folder?
In this step, you will need to install composer. If you want to install composer on your computer then you have to download the composer exe file and install it.
You can download the composer from here. Before downloading composer, make sure you are using a local server or if you are working on the live server then you will not need to download composer.
Now, run a command in the same folder where the PHPMailer folder is available.
1. Search run on your computer and enter cmd.
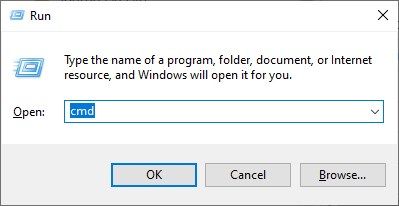
2. After this, command prompt will open.
3. Here, you have to move the project directory.
Like - Commands
cd c:\
Now you are in c drive.
cd xampp\htdocs\smtp
Here, smtp is a project folder name. You can set your project folder where the PHPMailer library is available.
Now, run a command to install the composer
composer require phpmailer/phpmailer
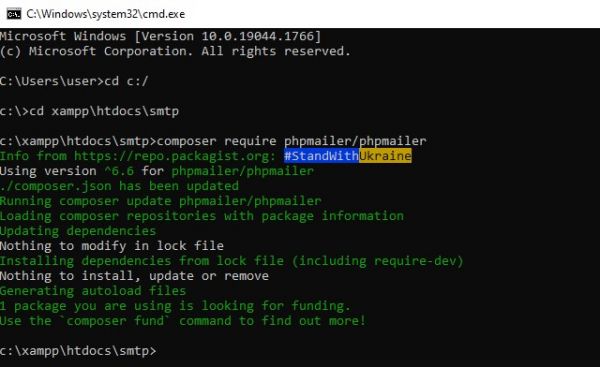
Or if you want to install composer on Hosting live server then find the terminal command line from the Cpanel or anywhere from your hosting and move to your project path using cd
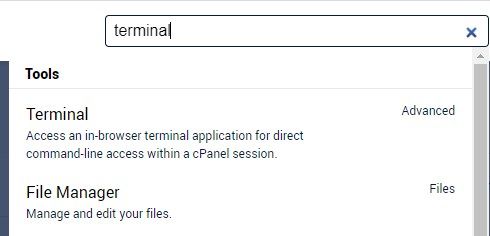
Like –
cd public_html\foldername
then use the same command
composer require phpmailer/phpmailer
If you are unable to do that then watch this video.
Don’t, worry about that , if you are unable to install composer then you can use PHPMailer without composer.
Now, that the composer has been installed then follow the next step.
Create an HTML form to send email using PHP mailer and Hosting SMTP –
In this tutorial, we are going to create an HTML form for the single and multiple emails sending processes.
In the same PHP file, we will use the PHPMailer code.
Now, create a form.php PHP file and paste the code below.
form.php
<?php use PHPMailer\PHPMailer\PHPMailer;
use PHPMailer\PHPMailer\SMTP;
use PHPMailer\PHPMailer\Exception;
//Load Composer's autoloader
require 'vendor/autoload.php';
$mail = new PHPMailer(true);
?>
<!DOCTYPE html>
<html>
<head>
<meta charset="utf-8">
<meta name="viewport" content="width=device-width, initial-scale=1">
<title>Email sending using PHPMAILER and Hosting SMTP </title>
<link rel="stylesheet" type="text/css" href="style.css">
</head>
<body>
<div class="container">
<?php
if(isset($_POST['submit_form']))
{
$to=$_POST['to'];
$subject=$_POST['subject'];
$msg=$_POST['msg'];
$name=$_POST['name'];
try {
//Server settings
//$mail->SMTPDebug = SMTP::DEBUG_SERVER; //Enable verbose debug output
$mail->isSMTP(); //Send using SMTP
$mail->Host       = 'mail.technosmarter.com';                     //Set the SMTP server to send through
    $mail->SMTPAuth   = true;                                   //Enable SMTP authentication
    $mail->Username   = '[email protected]';                     //SMTP username
    $mail->Password   = 'technosmarter12';                               //SMTP password
    $mail->SMTPSecure = 'tls';            //Enable implicit TLS encryption
    $mail->Port       = 587;                                    //TCP port to connect to; use 587 if you have set `SMTPSecure = PHPMailer::ENCRYPTION_STARTTLS`
$mail->setFrom('[email protected]', 'Techno Smarter');
//for multiple emails
    // $toarray=explode(",",$to);
    // foreach($toarray as $row)
    // {
    //      $mail->addAddress($row);
    // }
    //for single email
       $mail->addAddress($to,$name);     //Add a recipient              //Name is optional
    $mail->addReplyTo('[email protected]', 'Techno Smarter');
//$mail->addCC('[email protected]');
//$mail->addBCC('[email protected]');
//Attachments
//$mail->addAttachment('/var/tmp/file.tar.gz'); //Add attachments
//$mail->addAttachment('/tmp/image.jpg', 'new.jpg'); //Optional name
//Content
$mail->isHTML(true); //Set email format to HTML
$mail->Subject = $subject;
$mail->Body = $msg;
//$mail->AltBody = 'This is the body in plain text for non-HTML mail clients';
$mail->send();
echo '<div class="success ">Message has been sent</div>';
} catch (Exception $e) {
echo "Message could not be sent. Mailer Error: {$mail->ErrorInfo}";
}
}
?>
<h2>Email sending by PHPMailer(Hosting SMTP) ⛳</h2>
<form action="" method="POST">
<label> To Email :-</label>
<input type="text" name="to" class="form-control" required>
<label> Name :-</label>
<input type="text" name="name" class="form-control">
<label>Subject :-</label>
<input type="subject" name="subject" class="form-control" required>
<label> Message Body :-</label>
<textarea name="msg" cols="10" rows="5" class="form-control" required></textarea>
<br>
<input type="submit" name="submit_form" value="Send" class="btn-primary">
</form>
</div>
</body>
</html>
Note – Before using it , kindly understand the every approaches below .
$mail->Host = 'mail.technosmarter.com'; //Set the SMTP server to send through
$mail->SMTPAuth = true; //Enable SMTP authentication
$mail->Username = '[email protected]'; //SMTP username
$mail->Password = 'technosmarter12'; //SMTP password
$mail->SMTPSecure = 'tls'; //Enable implicit TLS encryption
$mail->Port = 587; //TCP port to connect to; use 587 if you have set `SMTPSecure = PHPMailer::ENCRYPTION_STARTTLS`
If you are using your hosting email then please set the correct details below. If you don’t know how to create an email from hosting Cpanel or hosting then follow the steps below.
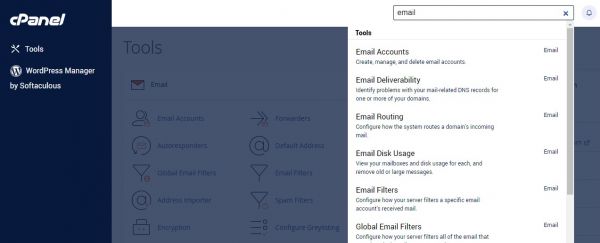
1. Find email – You can search email and find the email accounts option on your hosting Cpanel.
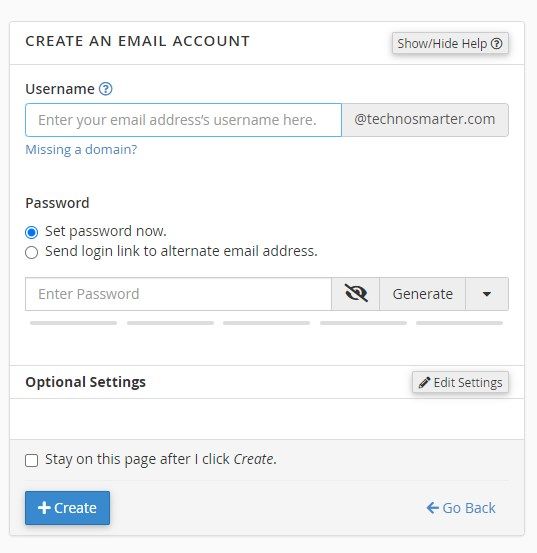
2. Create your email and password.
3. Now click on connect the device or check email.
4. In the email, you will see host, port, or ask from customer support.
Username – Your email id that you v created from email accounts
Password – Your created password
SMTPSecure – TLS
Port – 587
Or check in your hosting or try 465
//for multiple emails
// $toarray=explode(",",$to);
// foreach($toarray as $row)
// {
// $mail->addAddress($row);
// }
//for single email
$mail->addAddress($to,$name); //Add a recipient //Name is optional
$mail->addReplyTo('[email protected]', 'Techno Smarter');
The recipient email will come from the form.
If you want to send email to multiple recipients then change the code line above –
//for multiple emails
     $toarray=explode(",",$to);
     foreach($toarray as $row)
     {
          $mail->addAddress($row);
     }
    //for single email
       //$mail->addAddress($to,$name);     //Add a recipient              //Name is optional
It will help you send the same email to multiple recipients using the PHPMailer library and Hosting SMTP . Kindy enter emails separated by commas. You can change type text to textarea.
mail->addReplyTo('[email protected]', 'Techno Smarter');
You can set a reply to an email in this line above.
$mail->setFrom('[email protected]', 'Techno Smarter');
Kindly set your from email here like - [email protected]
If you want to design a form then use the stylesheet below –
Create a file in the same project folder –
style.css
body{
background-color: #f1f1f1;
	}
		.form-control {
    width: 100%;
    height: 34px;
    padding: 6px 12px;
    font-size: 14px;
    color: #555;
    background-color: #fff;
    border: 1px solid #ccc;
    border-radius: 4px;
}
.btn-primary {
    padding: 6px 12px;
    font-size: 14px;
    font-weight: 400;
    cursor: pointer;
    border: 1px solid transparent;
    border-radius: 4px;
    background-color: #337ab7;
    color: #fff;
}
textarea.form-control {
    height: auto;
}
.container
{
margin-left: 30%;
width: 400px ;
margin-top: 6%;
background-color: #fff;
padding: 30px;
padding-right: 60px;
box-shadow: 10px 5px 5px grey;
 }
label   {
	font-size: 18px;
}
.success
{
	margin: 5px auto;
  border-radius: 5px;
  border: 3px solid #fff;
  background: #33CC00;
  color: #fff;
font-size: 20px;
  padding: 10px;
  box-shadow: 10px 5px 5px grey;
}
Now, try to send emails using the form. If any issue is found, kindly upload the same project file on the hosting live server from the localhost.
And try it again.
Kindly check everything. Set all the host details correct.

How to use PHPMailer without composer?
Yes, you can use PHPMailer without composer. If you are getting errors like these –
Warning: require(vendor/autoload.php): failed to open stream: No such file or directory
Fatal error: require(): Failed opening required 'vendor/autoload.php' (include_path='C:xamppphpPEAR')
Or command line error –
'composer' is not recognized as an internal or external command,
operable program or batch file.
You can remove these errors by following the details above but if you are unable to do that then use PHPMailer library without composer.
You will need to change the code line –
require 'vendor/autoload.php';
to
require 'PHPMailer/src/Exception.php';
require 'PHPMailer/src/PHPMailer.php';
require 'PHPMailer/src/SMTP.php';
Here, PHPMailer is a folder name that was downloaded and extracted from the zip and renamed from PHPMailer-master to PHPMailer.
Now, you are able to use the PHPMailer library without a composer.
In this way, you can use the PHPMailer library with hosting SMTP.
If you have any issues, you can comment below or post a question on our QA forum.